Battery Reset
If your laptop will not turn on while plugged in, it may be necessary to reset the battery. Here’s how:
Be sure the laptop is unplugged from power and off before preforming any of these steps!
Start by unplugging the laptop.
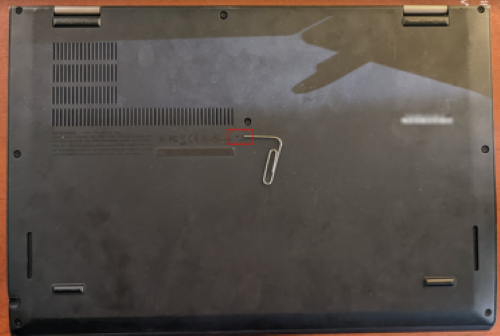
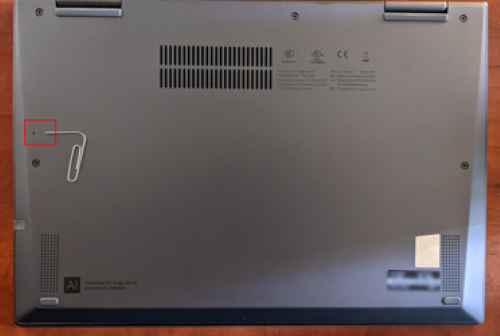
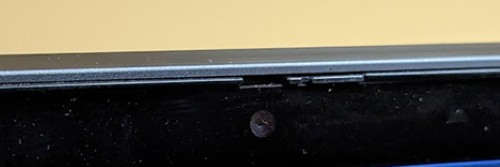
Turn the laptop over. Using a paperclip, press the battery reset button for 10 seconds located within the small opening in the middle of the laptop.
Lenovo X1 Yoga – 2nd Gen
Lenovo X1 Yoga – 6th Gen
After 10 seconds, remove the paperclip and reconnect the power.
Turn the laptop on using the power button.
If this does not work, try it one more time. If it still does not work, contact Saunders Technical Support (techsupport@saunders.rit.edu) for further assistance.
Camera Shutter
The 6th Gen Lenovo X1 Yoga laptops have a camera shutter that you can turn on and off to disable your camera.
If the shutter is on, the camera will not work.
Shutter On
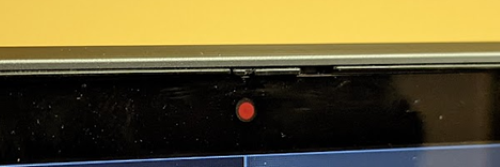
Shutter Off
Docking Station
There are two standard dock types we use. Both docks use a dock power adapter and a USB-C cable for connecting the laptop.
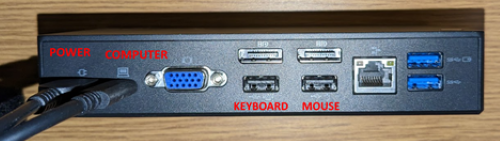
Cables on back of dock
When connecting the laptop cable to the dock, be sure to use the USB-C port on the back near the power port.
2nd Gen Dock
6th Gen Dock

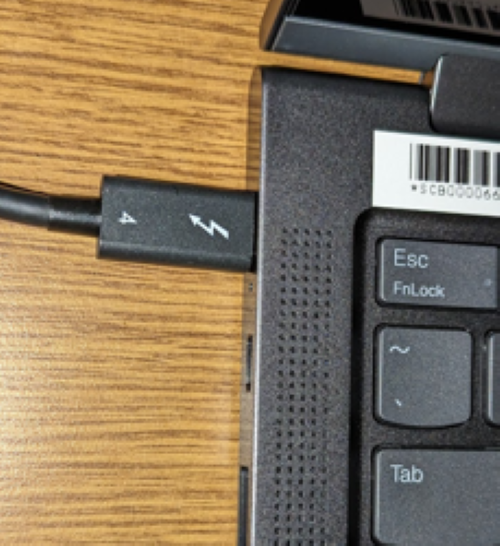
Cables to the computer
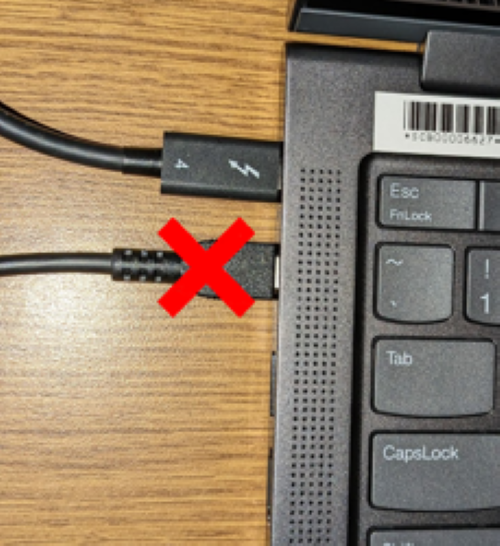
When connecting the dock to the laptop, use the USB-C port that is closest to the back of the laptop.
Never plug your power cord into the laptop while connected to the dock. The dock will power the laptop.
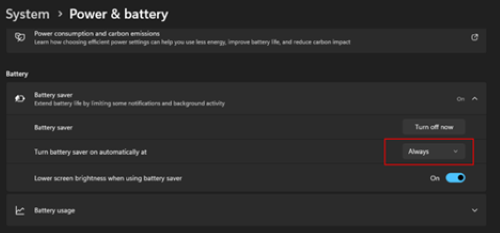
Increase Battery Life
If you want to increase your laptop’s battery life, consider turning on Battery Saver at all times. This does decrease performance when on battery, but does increase the life the the battery.
This only applies while you are on battery.
To adjust the settings, open Settings located in your Start menu.
Then open Power & battery under System.
Expand the Battery saver option and set Turn battery saver on automatically at to Always.
Monitors Not Working
Should your laptop no longer be working with the monitors through the dock, please try the following.
- Verify your monitors are turned on and plugged into power.
- Verify your docking station is plugged into power.
- Verify your monitor cables plugged into the dock and the back of the monitor.
- Verify your USB C cable is correct on the dock and your laptop:
- See Lenovo X1 Yoga – Docking Station for instructions.
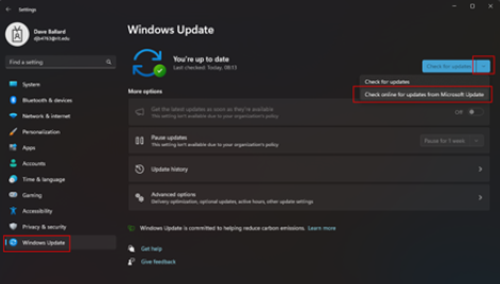
- Manually force an update of drivers by doing the following:
- Open Settings from the Start menu.
- Click on Windows Update along the left-hand side.
- Click on the down arrow next to Check for updates and select Check online for updates from Microsoft Update. This tool will also check for driver updates in addition to Windows updates.
- Allow the updates to install and then reboot.